Adobe Photoshop is a versatile and powerful tool for graphic design and photo editing. To harness its full potential, it’s essential to understand the various features and techniques it offers. Layer masking is one such indispensable feature, widely used by designers and photographers to achieve precise and professional results. In this article, we’ll explore the concept of layer masking in Photoshop, its applications, and how to use it effectively.
What is Layer Masking in Photoshop?
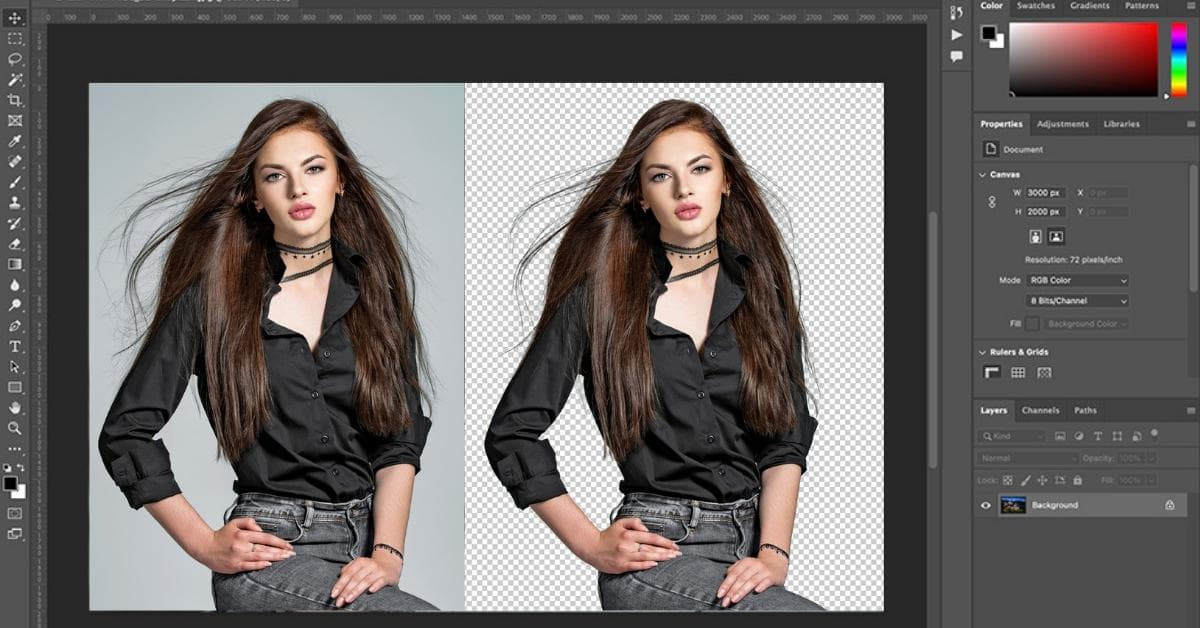
Layer masking is a non-destructive editing technique in Photoshop that allows you to control the visibility and transparency of specific parts of a layer while keeping the original image intact. It’s like using a stencil to paint only where you want, without affecting the entire canvas. A layer mask is essentially a grayscale image that defines which areas of a layer are visible, partially visible, or invisible.
How to Create a Layer Mask
- Select the Layer: To begin, choose the layer you want to apply the mask to. This could be an image, text, or any other element.
- Add a Layer Mask: At the bottom of the Layers panel, you’ll find a square icon with a circle inside – this is the Layer Mask button. Click it to add a mask to the selected layer.
- Paint on the Layer Mask: Once the mask is added, select the brush tool and paint with black and white to control visibility. Black hides, white reveals, and shades of gray provide varying levels of transparency.
Applications of Layer Masking
- Selective Editing: Layer masks are perfect for selective editing. For example, you can change the background of a photo without altering the main subject.
- Blending Images: Layer masking is crucial when blending two or more images together seamlessly. It allows you to mask parts of one layer to reveal underlying layers.
- Creating Effects: You can use layer masks to apply creative effects, like adding a soft focus effect to a specific area of a photo or creating a vignette.
- Texturing: Layer masks are often used to add textures or patterns to objects. This technique enhances the depth and realism of designs.
- Collage and Compositing: When working on a complex project with multiple elements, layer masking helps in arranging and blending them cohesively.
Tips for Using Layer Masks Effectively
- Use Soft Brushes: Soft-edged brushes provide smoother transitions between masked and unmasked areas, resulting in a more natural look.
- Experiment with Opacity: Adjust the opacity of your brush when painting on the layer mask for more subtle effects.
- Invert the Mask: To quickly switch between hiding and revealing, you can press “Ctrl + I” (Windows) or “Command + I” (Mac) on the layer mask.
- Layer Grouping: You can group layers together and apply a single layer mask to the group, which can save time and make your workflow more organized.
- Practice, Practice, Practice: The more you experiment with layer masks, the better you’ll become at using them effectively.
FAQs
1. Can I edit a layer mask after creating it?
Yes, you can. To modify a layer mask, select it in the Layers panel, and then use the brush or other painting tools to make changes. You can also adjust the opacity and blend mode of the brush for more precise editing.
2. What’s the difference between layer masks and the Eraser tool?
Layer masks are non-destructive, meaning you can revert or modify your changes at any time. The Eraser tool permanently removes pixels from a layer, making it less flexible for editing.
3. Can I use layer masks in combination with other adjustment layers?
Absolutely. Layer masks can be applied to adjustment layers, allowing you to control the impact of the adjustment on specific parts of an image.
4. Is layer masking only for photos, or can I use it in graphic design projects?
Layer masking is a versatile tool that can be used in both photo editing and graphic design. It’s essential for achieving precise and professional results in various design projects.
5. Are there any shortcuts for working with layer masks?
Yes, there are several keyboard shortcuts to make working with layer masks more efficient. For example, pressing “Alt + Click” on a layer mask thumbnail displays the mask in the document window.
Conclusion
Layer masking in Photoshop is a fundamental skill that opens up a world of creative possibilities. By using this non-destructive technique, you can edit, blend, and composite images with precision and finesse. As you continue to explore and practice layer masking, you’ll discover the true power of this feature, allowing you to create stunning visuals and designs. Remember to experiment, and don’t be afraid to push the boundaries of your creativity.
So, go ahead, dive into Photoshop, and unleash your inner artist using layer masks!
This page was last edited on 20 February 2024, at 3:23 pm