If you’re into digital image editing, you’ve probably heard the term “layer mask” tossed around. But what exactly is a layer mask? In this article, we’ll demystify this essential tool in Adobe Photoshop and help you unlock its creative potential. We’ll explain what layer masks are, how to use them, and provide answers to some frequently asked questions.
What Is a Layer Mask?
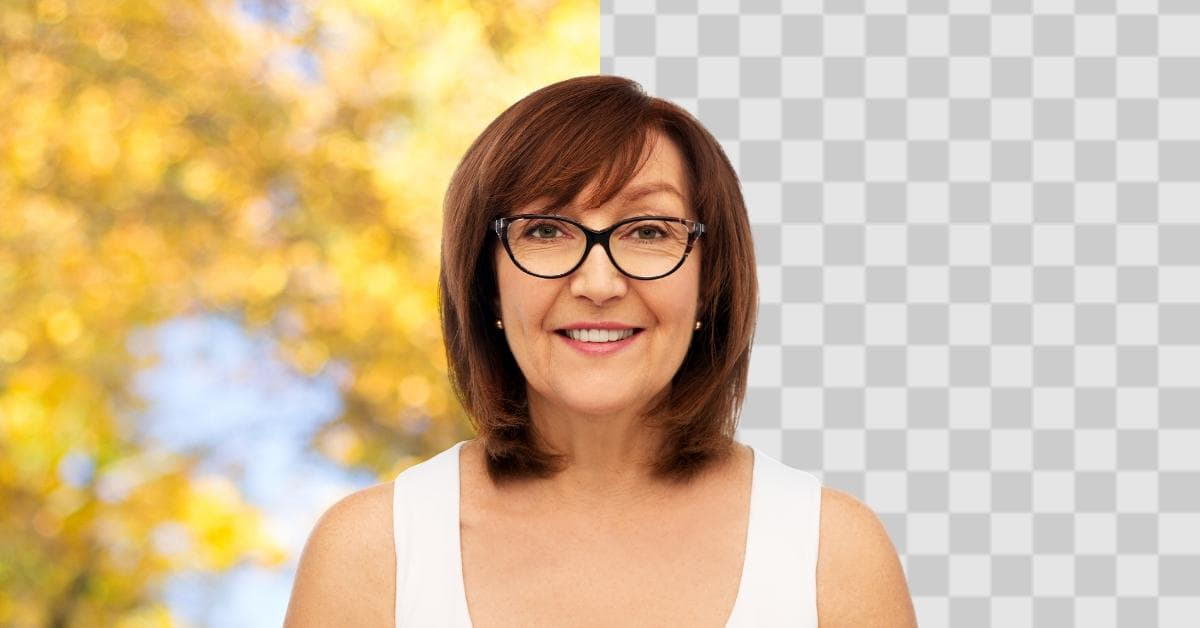
A layer mask in Photoshop is a non-destructive editing tool that allows you to hide, reveal, or modify specific areas of a layer without altering the original image. It’s like a digital stencil or a protective shield that conceals or reveals parts of a layer. Think of it as painting with opacity, creating smooth transitions and seamless blends.
How to Create a Layer Mask
- Open an Image: Start by opening an image in Photoshop.
- Duplicate the Layer: To add a layer mask, first, duplicate the layer you want to work on. This ensures you have a backup of the original.
- Add a Layer Mask: With the duplicated layer selected, go to the Layers panel and click the “Add Layer Mask” icon at the bottom. It looks like a square with a white circle inside.
- Using the Layer Mask: To edit the layer mask, select it in the Layers panel, and then use brushes, gradients, or selections to paint or erase parts of the mask. Black conceals, white reveals, and gray values provide varying levels of transparency.
Why Use Layer Masks?
Layer masks are incredibly useful for a variety of tasks:
- Non-Destructive Editing: They allow you to make changes to an image without permanently altering the original.
- Complex Compositions: You can combine multiple images and create seamless blends using layer masks.
- Selective Adjustments: Fine-tune specific areas of an image, like exposure, contrast, or color, while leaving the rest untouched.
- Reversible Edits: Mistakes are no problem; simply switch between black and white to correct or refine your work.
- Precise Editing: Achieve detailed and refined results, such as isolating hair or intricate objects from backgrounds.
- Creating Special Effects: Layer masks are a key element in creating effects like double exposure or selective color.
FAQs
1. Can I use layer masks in software other than Photoshop?
Yes, many other image editing software like GIMP, Corel PaintShop Pro, and even Adobe Photoshop Elements support layer masks. The principles are similar across programs, so the skills are transferable.
2. What’s the difference between layer masks and the Eraser tool?
The primary difference is that layer masks are non-destructive, meaning you can always reverse your edits. The Eraser tool permanently removes pixels from the image.
3. Can I use layer masks with text and shapes?
Absolutely! You can apply layer masks to text layers and vector shapes. This allows you to create unique text effects and custom shapes with precision.
4. How can I refine the edges of a layer mask?
To refine the edges of a layer mask, select the mask, and use the “Refine Mask” tool. This tool lets you smooth jagged edges and adjust the mask’s properties for a cleaner result.
5. Can I combine multiple layer masks on one layer?
Yes, you can stack multiple layer masks on a single layer. This is particularly useful for complex editing tasks, as you can control different aspects of the same layer.
6. Is it possible to animate layer masks for video editing?
Yes, you can animate layer masks in Adobe After Effects for video editing, creating dynamic effects and transitions.
Conclusion
Layer masks are a fundamental part of Photoshop, allowing you to edit your images with precision and creativity. They are indispensable for photographers, digital artists, and graphic designers. By understanding what layer masks are and how to use them effectively, you’ll be able to take your image editing skills to the next level. So, don’t be afraid to experiment and explore the vast possibilities layer masks offer in the world of digital art.
This page was last edited on 31 December 2023, at 3:00 pm