Cellulite, a common concern for many, can sometimes make its way into our digital photos, leaving us eager to find a solution even in the virtual world. This article will guide you through the process of removing cellulite in Photoshop, ensuring your images reflect the best version of yourself. Let’s delve into the steps, techniques, and considerations for achieving flawless, cellulite-free photos.
Removing Cellulite in Photoshop: A Step-by-Step Guide
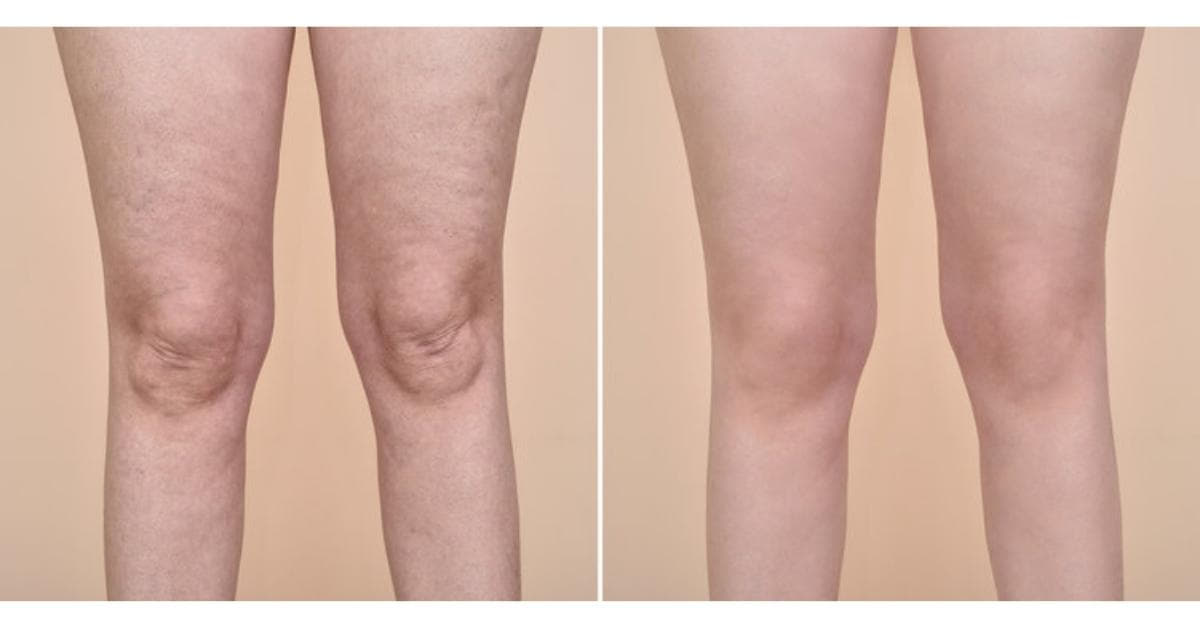
Embarking on a journey to perfect your digital images? Uncover the secrets of flawlessly removing cellulite in Photoshop with this step-by-step guide, ensuring your photos radiate confidence and authenticity. Let’s dive into the transformative world of digital photo enhancement.
Step 1: Open Your Image in Photoshop
Begin by launching Adobe Photoshop and opening the image you want to edit. Ensure that you are working on a duplicate of the original to preserve the original file.
Step 2: Zoom In for Precision
Zoom in on the area with cellulite to work with greater precision. This will allow you to make accurate adjustments without affecting the rest of the image.
Step 3: Select the Healing Brush Tool
Choose the Healing Brush Tool from the toolbar. This tool blends textures seamlessly, making it perfect for removing imperfections like cellulite.
Step 4: Adjust Brush Settings
Adjust the brush size to match the size of the cellulite area. Additionally, set the hardness to a low value for a softer effect. This will help the Healing Brush Tool to blend more naturally with the surrounding skin.
Step 5: Sample a Nearby Area
Hold down the ‘Alt’ key (Option key on Mac) and click on a nearby area of smooth skin. This samples the texture and color, which will be used to replace the cellulite.
Step 6: Paint Over the Cellulite
Carefully paint over the cellulite using the Healing Brush Tool. Take your time and make multiple strokes if necessary, ensuring a seamless blend.
Step 7: Check for Consistency
Zoom out periodically to check the overall consistency of your edits. Ensure that the retouched area blends well with the rest of the skin.
Step 8: Save Your Edited Image
Once satisfied with the results, save your edited image. Consider saving it with a new name to differentiate it from the original.
FAQs
Q1: Is it ethical to remove cellulite in Photoshop?
A1: Ethical considerations vary, but it’s essential to be transparent if the photo is for public consumption. In professional settings, maintaining authenticity is crucial.
Q2: Can I use other tools besides the Healing Brush?
A2: Yes, tools like the Clone Stamp Tool and the Spot Healing Brush can also be effective. Experiment with different tools to find the one that works best for you.
Q3: Are there any online tools for cellulite removal?
A3: Some online photo editing tools offer cellulite removal features. However, exercise caution to maintain the integrity of your images.
Q4: How can I prevent cellulite in photos naturally?
A4: Good lighting, proper posture, and using flattering angles can minimize the appearance of cellulite in photos without the need for photo editing.
Q5: Does removing cellulite in Photoshop require advanced skills?
A5: Basic Photoshop skills are sufficient for this task. Practice on duplicate images to enhance your proficiency.
Conclusion
Mastering the art of removing cellulite in Photoshop empowers you to present your best self in digital images. Remember to strike a balance between enhancement and authenticity, respecting ethical considerations. As you practice these techniques, you’ll gain the skills to achieve professional-looking results effortlessly.
This page was last edited on 20 February 2024, at 6:16 pm