In the world of photo editing, removing backgrounds is a common and essential task. It’s often necessary for creating professional-looking graphics, product images, or fun social media posts. But not everyone can afford expensive software, and that’s where Photopea comes to the rescue. In this comprehensive guide, we will explore how to use Photopea to remove backgrounds, step by step, while also addressing some frequently asked questions along the way.
Chapter 1: Getting Started with Photopea
In Chapter 1, we’ll take our first step into the world of Photopea, exploring what this versatile online photo editing tool has to offer and how to create an account for a seamless editing experience.
What is Photopea?
Photopea is an online graphic design and photo editing tool that closely resembles Adobe Photoshop in terms of functionality. It’s free to use and accessible in your web browser, making it a fantastic option for beginners and professionals alike.
Creating an Account
To get started with Photopea, visit their website (www.photopea.com) and create a free account if you wish to save your work. However, you can use Photopea without an account if you prefer.
Chapter 2: Opening an Image in Photopea
- Go to www.photopea.com.
- Click “File” in the upper-left corner.
- Select “Open” and choose your image file from your computer.
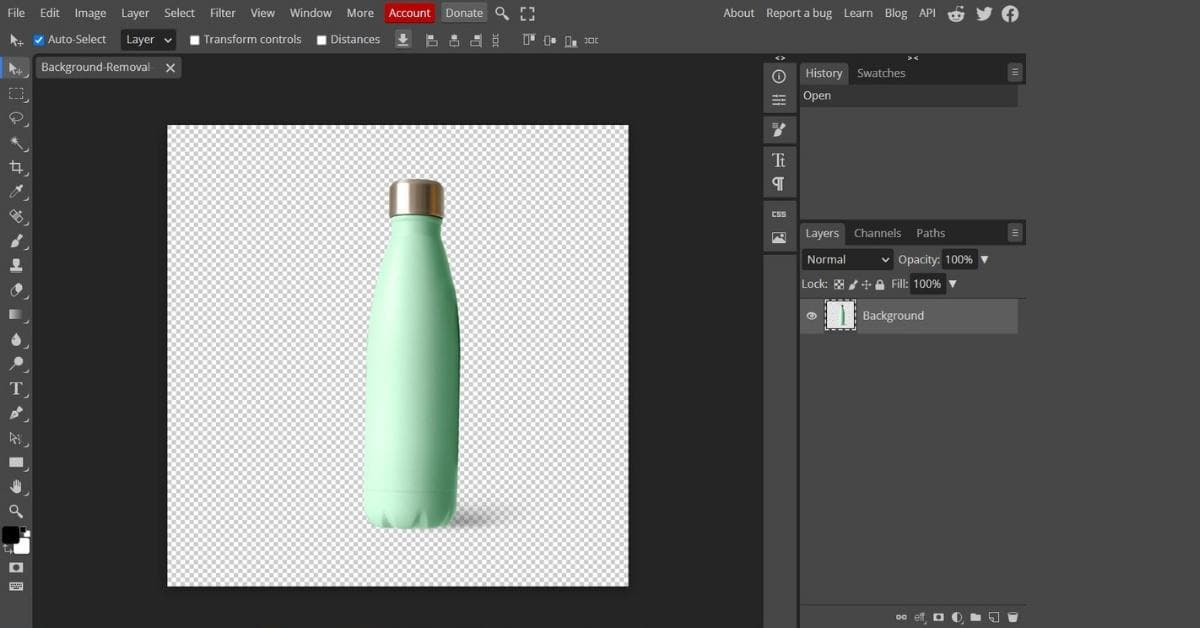
Chapter 3: Background Removal Using Photopea
Removing backgrounds with Photopea is a straightforward process.
- Select the Object: Choose the “Magic Eraser” tool or the “Lasso” tool from the left-hand toolbar. The Magic Eraser is perfect for simple backgrounds, while the Lasso is better for intricate selections.
- Outline the Object: Use the selected tool to outline the object you want to keep.
- Delete the Background: Press the Delete key on your keyboard to remove the selected background.
- Refine the Edges: Click “Select” and choose “Refine Edge” to fine-tune the selection. Adjust the settings to make the edges appear smoother.
- Save Your Image: Click “File” and select “Save As” to save your edited image.
Conclusion
Photopea is a powerful and user-friendly tool for background removal, graphic design, and photo editing. It’s versatile, accessible, and offers an impressive set of features for a free tool. By following the steps outlined in this guide, you can master background removal and enhance your photo editing skills. Get creative, experiment, and enjoy the convenience of Photopea on your journey to stunning, professional-looking images.
FAQs
Photopea offers a free online version that provides most features you need. However, a paid Premium version is available for more advanced users who require additional capabilities.
Photopea offers many of the same features as Photoshop but in an online and more user-friendly format. While Adobe Photoshop is considered the industry standard, Photopea is a cost-effective alternative for casual users and beginners.
Yes, Photopea works on both desktop and mobile devices. You can access it through a web browser, making it a versatile option for various platforms.
Photopea supports a wide range of image formats, including PSD, XCF, JPEG, PNG, GIF, and more. You can easily open and edit images in your preferred format.
The free version of Photopea is quite robust, but it may have occasional ads and certain advanced features may be restricted. However, for basic photo editing and background removal, it’s more than sufficient.
This page was last edited on 27 February 2024, at 9:57 am