Adobe Illustrator is a powerful graphic design and image editing software that allows you to create stunning vector images. One of its most useful features is Image Trace, which enables you to convert raster images, like photographs, into editable vector graphics. In this comprehensive guide, we’ll walk you through the process of using Image Trace in Adobe Illustrator, step by step. By the end, you’ll have a solid understanding of how to make the most of this tool to enhance your design projects.
What is Image Trace in Adobe Illustrator?
Image Trace is a feature in Adobe Illustrator that allows you to convert raster images, such as photographs or scanned drawings, into editable vector graphics. Vector graphics are made up of paths and anchor points, which ensure that your image can be scaled up or down without losing quality. Image Trace simplifies the process of turning complex bitmap images into clean, scalable vector artwork.
How to Access Image Trace
To access Image Trace in Adobe Illustrator, follow these steps:
- Open Adobe Illustrator and create a new document or open an existing one.
- Place your raster image into the document. You can do this by going to “File” > “Place” and selecting your image.
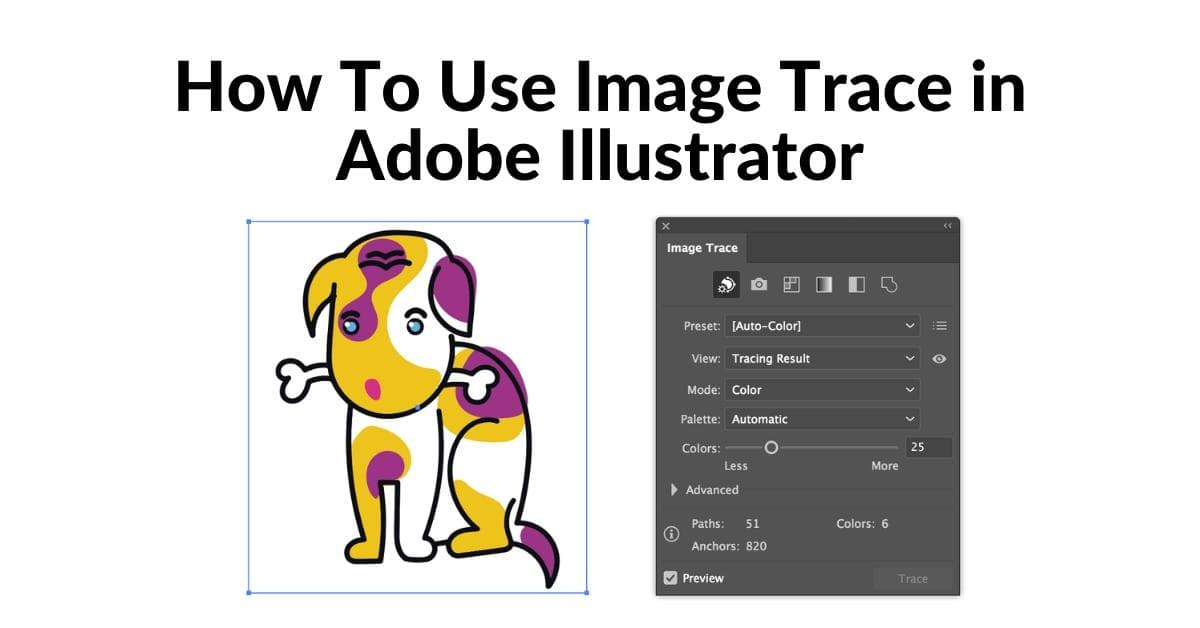
- With the image selected, go to the “Window” menu and select “Image Trace” to open the Image Trace panel.
Understanding Image Trace Presets
The Image Trace panel provides a range of preset options that help you get the desired result quickly. Here are some commonly used presets:
- Auto-Color: Ideal for full-color images with lots of colors.
- High Color: Great for retaining details and colors.
- Low Color: Useful for simplifying the image by reducing colors.
- Grayscale: Converts the image to grayscale, perfect for black and white illustrations.
- Black and White: Converts the image to a high-contrast black and white version.
Adjusting Image Trace Settings
To further fine-tune your Image Trace, click the “Advanced” option in the Image Trace panel. Here, you can adjust settings like:
- Threshold: Controls the sensitivity of the tracing.
- Paths: Determines the number of paths in the traced image.
- Corners: Defines the sharpness of corners in the traced artwork.
Tracing an Image
Once you’ve selected a preset and adjusted the settings to your liking, click the “Trace” button in the Image Trace panel. Illustrator will process the image, and you’ll see a preview of the traced result.
Expanding the Traced Image
To make the traced image editable, select your traced image and click the “Expand” button in the control bar. This action converts the traced image into vector paths and anchor points.
Refining the Traced Image
After expanding the image, you can further refine it by using Illustrator’s drawing and editing tools. Adjust anchor points, remove unwanted paths, or add details to achieve the desired look.
Saving Your Vector Image
Once you’re satisfied with your traced vector image, save it in a vector format, like .ai or .svg. This ensures that your artwork remains editable and scalable for future use.
FAQs
Q1: Can I trace any type of image with Image Trace in Illustrator?
A1: Image Trace works best with high-contrast images, such as drawings, logos, and well-defined photographs. Images with too much detail or low contrast may not yield optimal results.
Q2: How do I change the colors of a traced image?
A2: After expanding the traced image, you can select specific paths and change their colors using the Fill and Stroke options in the Control panel.
Q3: Is Image Trace the same as Live Trace in older versions of Illustrator?
A3: Yes, Image Trace is an updated version of the Live Trace feature found in older Illustrator versions.
Q4: What should I do if the traced image contains unwanted artifacts?
A4: You can use the Direct Selection tool (white arrow) to select and delete unwanted anchor points or paths in the traced image.
Q5: Can I adjust the level of detail in the traced image?
A5: Yes, by tweaking the settings in the Advanced section of the Image Trace panel, you can control the level of detail and smoothness in your traced image.
Conclusion
Mastering Image Trace in Adobe Illustrator is a valuable skill for any graphic designer or illustrator. It allows you to transform raster images into versatile vector graphics, opening up a world of possibilities for your creative projects. With the step-by-step guide provided here, you have the tools to make the most of this feature and enhance your design work. Experiment with different presets and settings to achieve the desired results, and remember that practice makes perfect. Happy tracing!
This page was last edited on 22 February 2024, at 5:53 pm