In the world of graphic design, creating visually stunning and innovative compositions is key. One technique that can significantly elevate your designs is the use of clipping masks. Clipping masks in Canva allow you to blend images and text seamlessly, opening the door to endless creative possibilities. In this comprehensive guide, we will walk you through the image editing process of creating a clipping mask in Canva, step by step, and address some frequently asked questions to help you master this powerful design tool.
What is a Clipping Mask?
A clipping mask is a design feature that allows you to constrain the visibility of one element based on the shape or content of another element. In Canva, you can create clipping masks by blending text, images, or other design elements to achieve a harmonious and visually appealing composition.
Why Use Clipping Masks in Canva?
Clipping masks offer a range of creative possibilities, making your designs more appealing and professional. Here are a few reasons to use clipping masks in Canva:
- Image Text Integration: You can blend text into an image seamlessly, creating eye-catching designs with text elements that appear as if they are part of the image.
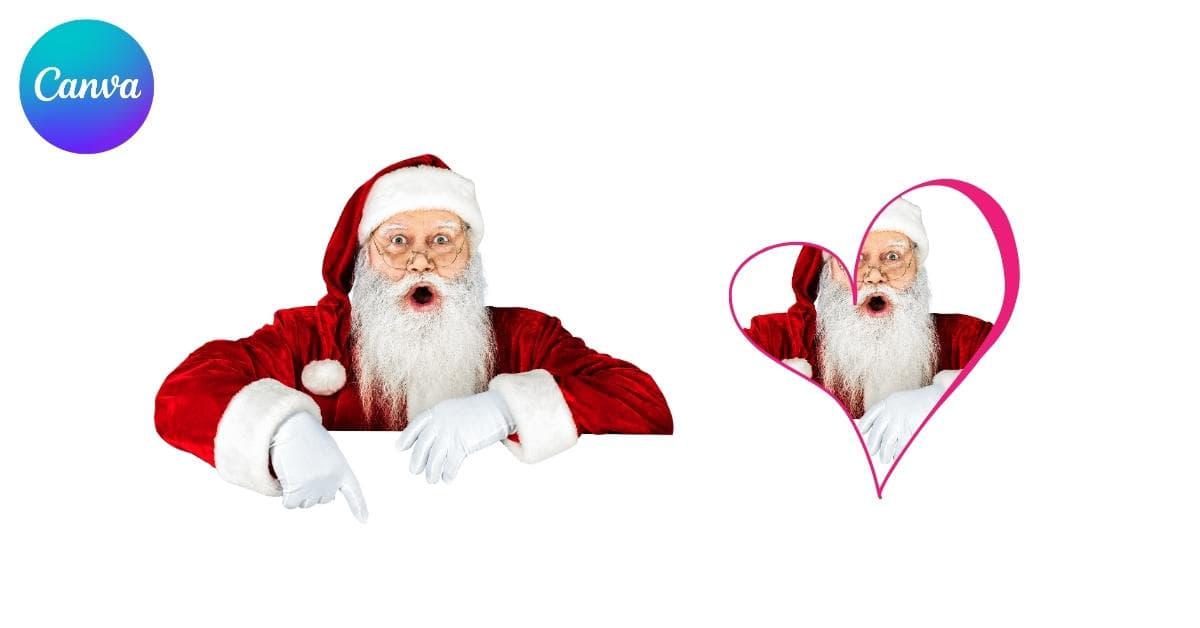
- Unique Shapes: Clipping masks enable you to create unique shapes for your images, giving your designs a distinct and creative edge.
- Visual Hierarchy: Using clipping masks, you can emphasize specific parts of an image or create visual focal points within your design.
- Collages: Create stunning collages by blending multiple images together using clipping masks.
Step-by-Step Guide: How to Create a Clipping Mask in Canva
Step 1: Log in to Canva
If you haven’t already, log in to your Canva account or sign up for a free one.
Step 2: Create a New Design
Click on “Create a design” and select the type of design you want to work on (e.g., social media post, presentation, or custom dimensions).
Step 3: Import or Create Your Image
You can either upload an image from your computer or use Canva’s built-in image library to find the perfect picture.
Step 4: Add the Image or Shape to Be Masked
Drag and drop the image or shape you want to use as the mask onto your canvas. Position it where you want the clipping mask effect to be applied.
Step 5: Arrange Layers
Make sure the layer with the image or shape you want to mask is placed below the element you want to clip. To adjust the layer order, use the “Position” option in the top menu.
Step 6: Create the Clipping Mask
Select the image or shape that will be used as the mask. Right-click on it and choose “Mask” from the dropdown menu. This will create the clipping mask, revealing the masked element in the shape of your chosen mask.
Step 7: Adjust and Fine-Tune
You can now adjust and fine-tune the position and size of the masked element, or you can modify the mask itself by resizing or reshaping it.
FAQs
What is the difference between a clipping mask and a regular mask in Canva?
A clipping mask in Canva is used to reveal an image or element in the shape of another element. In contrast, a regular mask hides a part of an image or element. Clipping masks are commonly used for creative designs, while regular masks can be used for more traditional masking and cropping.
Can I use a custom shape as a clipping mask?
Yes, you can create custom shapes in Canva, and these can be used as clipping masks. Simply draw the shape you want to use, place it above the image or element you want to mask, and follow the steps to create a clipping mask.
Can I apply a clipping mask to text in Canva?
No, you cannot apply a clipping mask directly to text in Canva. However, you can overlay text on an image and use the image as a clipping mask for the text. This allows you to create text with a unique image texture.
How can I edit or remove a clipping mask?
To edit a clipping mask, select the clipped element and move or resize it as needed. To remove a clipping mask, right-click on the clipped element and select “Unmask.” This will return the element to its original state.
Can I use multiple clipping masks in a single design?
Yes, you can use multiple clipping masks in a single design. This allows for complex and layered compositions. Simply follow the same steps for each masking effect you want to apply.
Conclusion
Mastering the art of creating clipping masks in Canva opens the door to a world of creative possibilities. Whether you want to blend text and images seamlessly, create unique shapes, or design captivating collages, clipping masks are a powerful tool at your disposal. Experiment, practice, and elevate your graphic design skills with this essential technique in Canva. Start creating your stunning designs today!
This page was last edited on 20 February 2024, at 5:17 pm