In the realm of digital photography and image editing, Photoshop remains a powerful tool for unleashing creativity. Adding jewelry to a model in Photoshop can elevate your photographs, providing a touch of sophistication and glamour. In this guide, we’ll explore step-by-step instructions on how to seamlessly integrate jewelry into your images, transforming ordinary shots into extraordinary works of art.
Step 1: Selecting the Right Image
Begin by opening the image in Photoshop that you want to enhance with jewelry. Choose a high-resolution photo to ensure the details of the jewelry stand out and blend naturally with the model.
Step 2: Choosing the Right Jewelry
Selecting the appropriate jewelry is crucial for a realistic outcome. Pay attention to the style, size, and color of the jewelry to match the overall aesthetic of the image and the model’s attire.
Step 3: Isolating the Jewelry
Use the Pen Tool or the Lasso Tool to carefully outline the jewelry item you want to add. Once selected, create a new layer to isolate the jewelry from the rest of the image.
Step 4: Placing the Jewelry
After isolating the jewelry, position it on the model’s body where you want it to appear. Utilize the Transform tool (Ctrl+T or Command+T) to adjust the size, rotation, and perspective, ensuring a seamless integration.
Step 5: Adjusting Lighting and Shadows
To make the added jewelry look realistic, pay attention to lighting and shadows. Use the Dodge and Burn tools to create highlights and shadows that match the ambient lighting in the original photo.
Step 6: Blending and Refinement
To achieve a natural look, focus on blending the edges of the added jewelry with the model’s skin or clothing. Adjust the opacity and use layer masks to refine and blend seamlessly.
Step 7: Final Touches
Evaluate the overall composition and make any necessary adjustments. Fine-tune the color balance, saturation, and contrast to ensure the added jewelry harmonizes with the entire image.
FAQs
Q1: Can I use any image for adding jewelry in Photoshop?
A1: While you can use any image, it’s recommended to choose high-resolution photos to ensure better detailing and a more realistic outcome.
Q2: Is Photoshop the only software for adding jewelry to a model?
A2: While Photoshop is a popular choice, other image editing software like GIMP and Adobe Lightroom also offer similar capabilities.
Q3: How can I make the added jewelry look natural?
A3: Pay attention to lighting, shadows, and blending. Adjust the lighting on the added jewelry to match the original photo, and carefully blend the edges for a seamless integration.
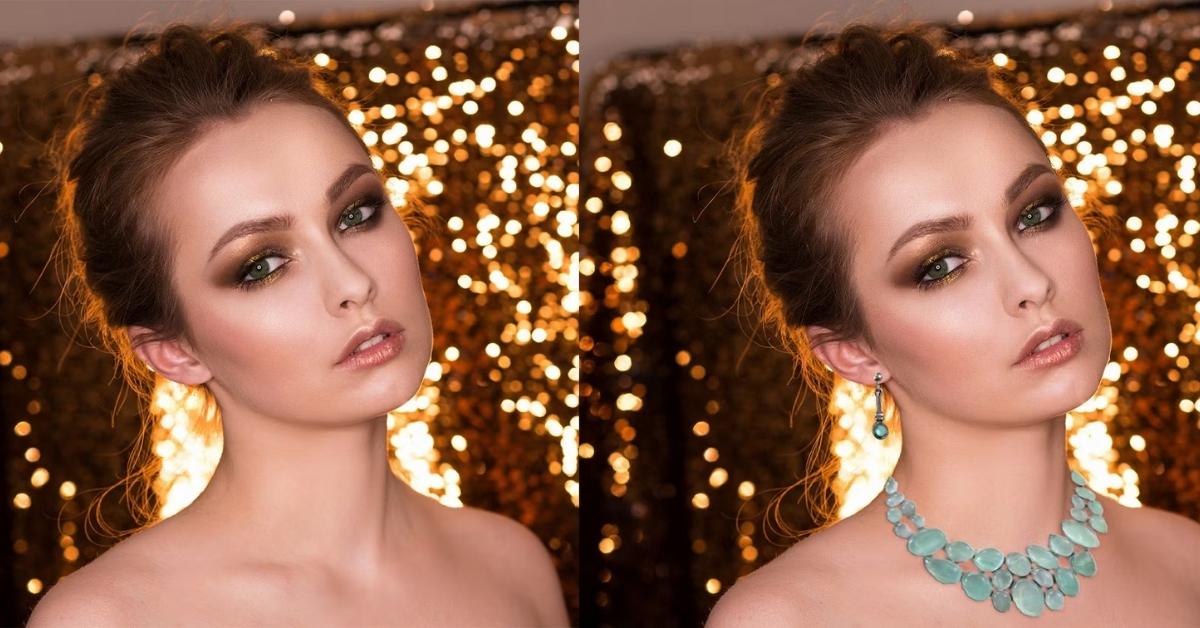
Q4: Can I add different types of jewelry, such as necklaces and earrings, in the same image?
A4: Yes, you can add multiple types of jewelry in the same image by following the same process for each item.
Q5: Are there any shortcuts for adding jewelry more efficiently?
A5: Using keyboard shortcuts like Ctrl+T (Command+T on Mac) for transforming and Ctrl+J (Command+J on Mac) for duplicating layers can speed up the process.
Conclusion
Adding jewelry to a model in Photoshop is a creative and rewarding process that can significantly enhance your photography skills. Experiment with different styles and types of jewelry to achieve unique and captivating results. With practice, you’ll master the art of seamlessly integrating jewelry into your images, turning your photos into stunning visual stories.
This page was last edited on 31 January 2024, at 10:00 am