High Dynamic Range (HDR) blending corrections have become an essential technique for photographers seeking to capture the full spectrum of light in their images. This article will guide you through the process of HDR blending corrections, offering insights, tips, and step-by-step instructions to help you achieve stunning results. From understanding the basics to mastering advanced techniques, we’ve got you covered.
Understanding HDR Blending Corrections
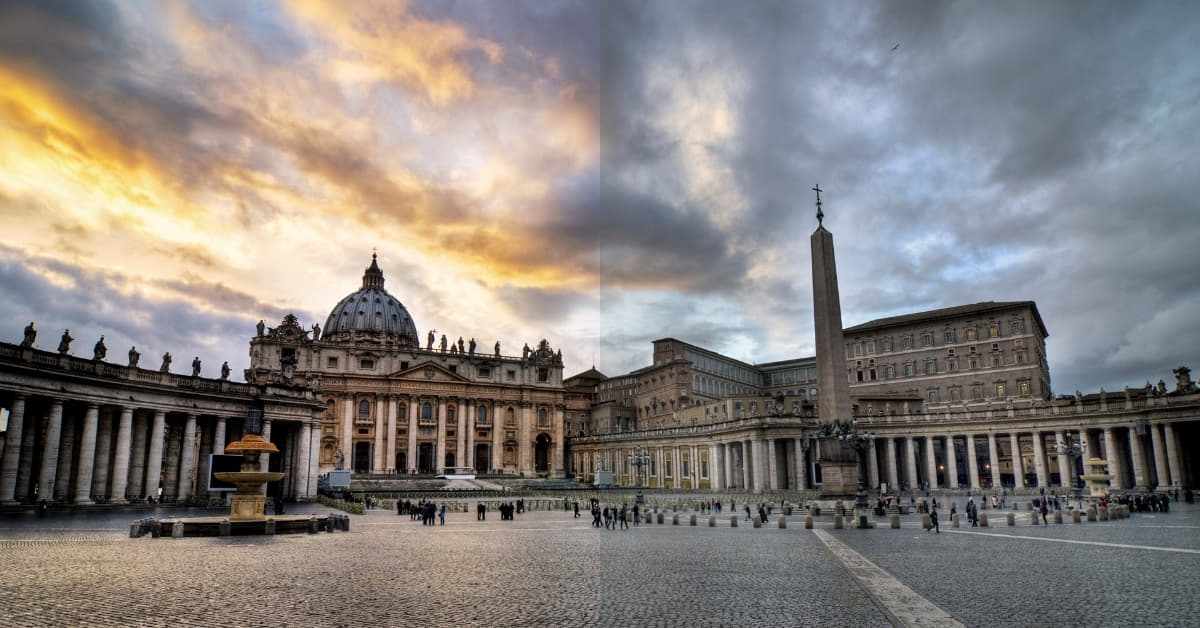
HDR blending corrections involve combining multiple exposures of the same scene to create an image that preserves details in both the shadows and highlights. This technique is particularly useful in challenging lighting conditions, such as scenes with extreme contrast. Here’s a breakdown of the key steps involved:
1. Capture Multiple Exposures:
- Start by capturing a series of bracketed shots at different exposure levels.
- Ensure each exposure captures details in specific tonal ranges, from shadows to highlights.
2. Selecting the Right Software:
- Choose a reliable HDR software that suits your workflow. Popular options include Adobe Lightroom, Photomatix, and Aurora HDR.
- Import your bracketed shots into the chosen software.
3. Align and Merge Exposures:
- Use the software to align the images, compensating for any slight movements during the capture.
- Merge the exposures to create a single HDR image.
4. Tone Mapping:
- Apply tone mapping to adjust the tonal values and enhance the overall dynamic range.
- Fine-tune settings such as contrast, saturation, and color balance for a natural look.
5. Local Adjustments:
- Refine specific areas by making local adjustments.
- Use brushes or masks to selectively enhance or reduce the impact of the HDR effect.
6. Final Touches:
- Evaluate the final image and make additional adjustments if needed.
- Ensure the image looks natural and maintains a realistic balance between shadows and highlights.
Tips for Successful HDR Blending Corrections
- Maintain Realism:
Avoid over-processing your HDR images, as overly dramatic effects can lead to an unnatural appearance. - Experiment with Styles:
Play with different styles and presets to find the look that best suits your creative vision. - Bracketing:
Use a tripod for bracketed shots to ensure alignment during the merging process.
FAQs
Is HDR blending only for extreme lighting conditions?
While HDR blending is particularly useful in challenging lighting situations, it can enhance the overall dynamic range of any image, adding depth and detail.
Can I achieve HDR blending corrections without specialized software?
Specialized HDR software simplifies the process, but some photo editing software, like Adobe Lightroom, also offers basic HDR capabilities.
Are there any drawbacks to HDR blending?
Over-processing can lead to unnatural-looking images. It’s essential to strike a balance and maintain a realistic appearance.
Can I use HDR blending for all types of photography?
Yes, HDR blending can be applied to various genres, including landscapes, architecture, and even portraits, to achieve striking and detailed results.
Conclusion
Mastering HDR blending corrections is a valuable skill for photographers looking to elevate their images. By understanding the basics and following a structured workflow, you can achieve stunning results that preserve details across the entire tonal range. Experiment with different styles, be mindful of realism, and enjoy the creative possibilities that HDR blending offers.
This page was last edited on 22 February 2024, at 1:40 pm