In the ever-evolving realm of graphic design, the ability to convert images to vectors is a crucial skill that every designer should possess. Adobe Photoshop, a powerhouse in the world of creative software, offers a seamless solution for this task. In this article, we’ll explore the step-by-step process of converting an image to a vector in Photoshop, ensuring a smooth transition from pixels to vectors.
Understanding the Basics
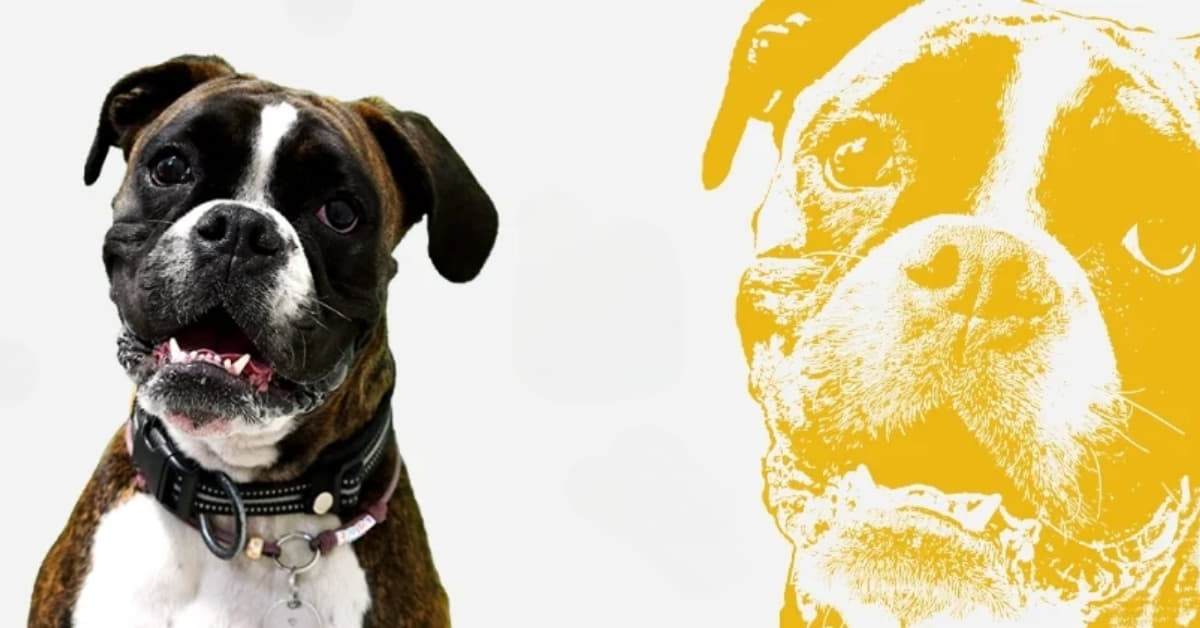
Vector images are resolution-independent, allowing for infinite scalability without loss of quality. In contrast, raster images, which include common formats like JPEG and PNG, are composed of pixels and can lose quality when resized. Converting a raster image to a vector format opens up a world of possibilities for resizing, editing, and enhancing the image.
Step-by-Step Guide to Convert Image to Vector in Photoshop
Embark on a transformative journey in graphic design as we present a comprehensive step-by-step guide, unraveling the secrets of converting images to vectors using Adobe Photoshop. Follow these clear instructions to seamlessly transition from pixels to infinitely scalable vectors.
Step 1: Import Your Image
- Open Adobe Photoshop and import the image you want to convert to a vector.
Step 2: Select the Image Layer
- In the Layers panel, select the image layer you imported.
Step 3: Image Trace
- Navigate to the “Window” menu and select “Image Trace” to open the Image Trace panel.
- Adjust the settings in the panel to suit your preferences and click “Trace.”
Step 4: Expand the Vector
- After tracing, right-click on the image and select “Expand” to convert the traced image into editable vector paths.
Step 5: Refine the Vector Paths
- Use the Direct Selection tool to refine and edit the vector paths as needed.
- Make adjustments to achieve the desired look and feel of the vector image.
Step 6: Save the Vector Image
- Once satisfied with the vector conversion, save your file in a vector format like SVG or AI.
FAQs
Can I convert any image to a vector in Photoshop?
Yes, Photoshop’s Image Trace feature is versatile and can convert a wide range of images, but results may vary based on the complexity of the image.
Will the vector conversion process affect image quality?
No, converting an image to a vector in Photoshop allows for scaling without loss of quality, making it ideal for various design applications.
Are there any limitations to the Image Trace feature in Photoshop?
While powerful, Image Trace may not handle extremely complex images or photographs as effectively. Manual adjustments might be required for optimal results.
Can I edit the vector paths after conversion?
Absolutely! Photoshop provides tools like the Direct Selection tool to refine and edit vector paths post-conversion.
What file formats should I use to save my vector image?
For maximum compatibility and flexibility, save your vector image in formats like SVG (Scalable Vector Graphics) or AI (Adobe Illustrator).
Conclusion
Unlocking the potential of Adobe Photoshop to convert images to vectors empowers designers to create stunning, scalable graphics. By following the step-by-step guide outlined in this article, you can seamlessly transition from pixel-based images to versatile vectors, expanding your creative possibilities in the world of graphic design.
This page was last edited on 25 February 2024, at 11:53 am