In the fast-paced world of visual storytelling, the need for flexibility and convenience in editing tools has never been greater. Adobe Lightroom Mobile stands as a beacon for photographers and creatives seeking to enhance their images on the go. This guide will walk you through the intricacies of color correction in Lightroom Mobile, empowering you to bring your creative vision to life anytime, anywhere.
Exploring Color Correction in Lightroom Mobile:
1. Understanding Color Correction:
Color correction in Lightroom Mobile involves the adjustment of tones, hues, and saturation to achieve a balanced and visually appealing look. This is vital for photographers looking to elevate the quality of their mobile photography.
2. Importing Your Images:
Begin your color correction journey by importing your images into Lightroom Mobile. The app’s user-friendly interface makes this process seamless, allowing you to organize and edit your photos effortlessly.
3. Basic Adjustments:
Lightroom Mobile offers a range of basic adjustment tools. Experiment with exposure, contrast, and highlights to lay the foundation for effective color correction.
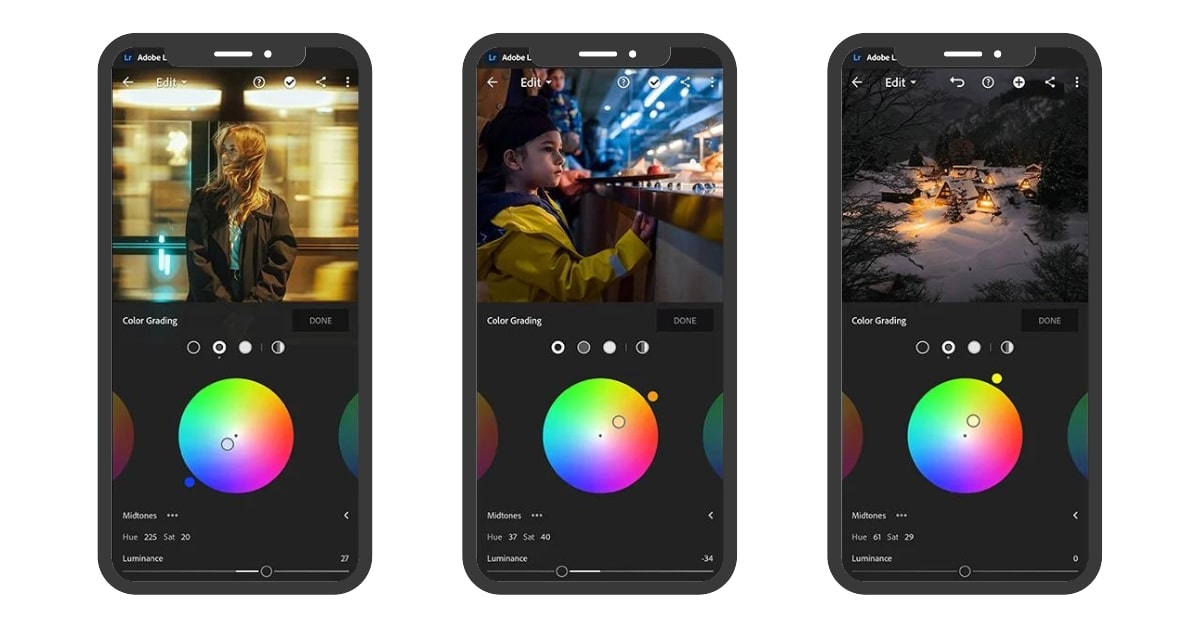
4. Utilizing Color Grading:
Dive into the world of color grading within Lightroom Mobile. Adjust individual color channels, experiment with split toning, and create a distinctive look for your photos.
5. Presets and Profiles:
Leverage the power of presets and profiles to streamline your color correction process. Lightroom Mobile provides a variety of presets, or you can create and save your own for quick and consistent edits.
Tools for Mobile Color Correction Mastery:
- HSL/Color Panel:
The HSL (Hue, Saturation, Luminance) panel allows precise control over individual colors in your image, enabling targeted adjustments. - White Balance Selector:
Use the white balance selector to correct color temperature by clicking on a neutral area in your photo. - Before-and-After View:
The before-and-after view in Lightroom Mobile lets you compare your edits with the original image, helping you assess the impact of your color correction adjustments.
Conclusion
Color correction in Lightroom Mobile is a game-changer for photographers who demand flexibility and excellence in their editing process. With an array of intuitive tools and features, this mobile application puts the power of professional-level color correction in the palm of your hand. Dive into the world of on-the-go creativity and let Lightroom Mobile be your companion in crafting visually stunning and captivating images wherever your inspiration takes you.
FAQs
Can I achieve professional-level color correction on Lightroom Mobile?
Yes, Lightroom Mobile provides powerful color correction tools that allow you to achieve professional-level results. Many photographers rely on it for on-the-go editing.
Are Lightroom Mobile presets interchangeable with the desktop version?
Yes, Lightroom presets can be synced between the mobile and desktop versions through Adobe Creative Cloud, ensuring a seamless editing experience across devices.
How do I reset edits if I’m not satisfied with the color correction?
To reset edits in Lightroom Mobile, tap the three dots in the top-right corner of the screen and choose “Reset.” This will revert your image to its original state.
Can I use Lightroom Mobile for video color correction?
As of my last knowledge update in January 2022, Lightroom Mobile primarily focuses on photo editing. For video color correction, Adobe Premiere Rush or other video editing apps would be more suitable.
This page was last edited on 25 February 2024, at 2:26 pm