Embarking on a color correction journey is like unlocking the secret to a world of vibrant, compelling visuals in your creative endeavors. Whether you’re a photographer, videographer, or graphic designer, the ability to master color correction is a skill that can elevate your work to new heights. In this guide, we’ll take you through the exciting and transformative process of the color correction journey, exploring the principles, techniques, and tools that will shape your visual storytelling.
Color Correction Journey: From Basics to Mastery
1. Understanding the Basics:
Your journey begins with grasping the fundamental concepts of color correction. Learn about white balance, exposure correction, and the significance of achieving accurate and natural colors in your visuals.
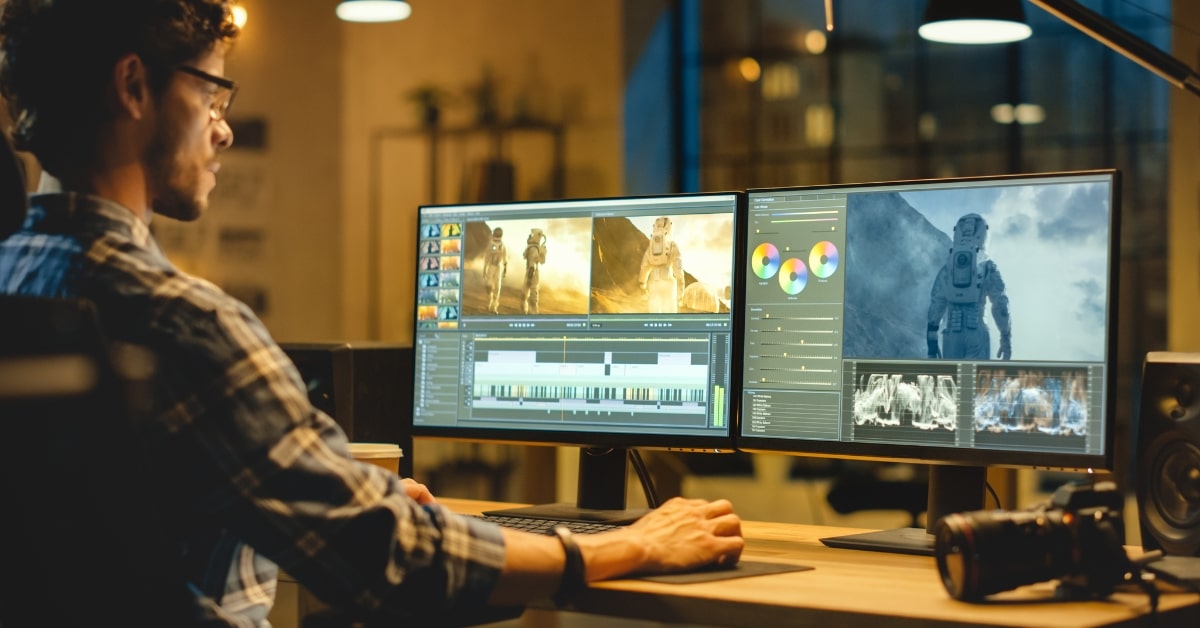
2. Choosing the Right Tools:
Explore the variety of tools available for color correction, from simple adjustments in photo editing software to advanced color grading features in video editing applications. Familiarize yourself with color wheels, curves, and other tools that enable precise control over your color adjustments.
3. Mastering Software Applications:
Whether you’re using Adobe Photoshop, DaVinci Resolve, or other editing software, take the time to master the specific color correction features each application offers. This step is crucial for unleashing the full potential of your creative endeavors.
4. Experimenting with Color Grading:
As you progress in your journey, delve into the art of color grading. This advanced stage allows you to not only correct colors but also express your unique style and mood through intentional color choices. Experiment with LUTs (Look-Up Tables) and creative filters to add depth and emotion to your visuals.
5. Consistency Across Projects:
Achieving a consistent look across your projects is a hallmark of a seasoned color correction artist. Understand techniques for maintaining color consistency, especially when working on a series of images or videos.
Tools for a Successful Color Correction Journey:
- Color Correction Software:
Invest time in learning popular color correction software such as Adobe Lightroom, Photoshop, or DaVinci Resolve. - Calibration Tools:
Regularly calibrate your monitor to ensure that the colors you see are accurate. Calibration tools help maintain consistency in your color correction work. - Reference Images:
Build a collection of reference images with accurate colors. These serve as guides for achieving precise color correction in your own projects.
Conclusion
Embarking on your color correction journey is a dynamic and rewarding process. From understanding the basics to mastering advanced techniques, each step contributes to your growth as a visual storyteller. Embrace the experimentation, stay curious, and watch as your color correction skills evolve, transforming your creative vision into stunning, visually compelling narratives. Enjoy the journey, and let your creativity shine through the vibrant spectrum of color correction possibilities.
FAQs
Is color correction necessary for all types of visual content?
While not mandatory, color correction enhances the quality and visual appeal of various content types, including photos, videos, and graphic designs.
How do I know if my monitor needs calibration?
If you notice discrepancies in color between your monitor and other devices or if your images appear different when viewed on other screens, it’s time to calibrate your monitor.
Can I use color correction presets, or should I make adjustments manually?
Both approaches have merit. Presets can be a quick starting point, but manual adjustments provide more control and precision tailored to your specific project.
How often should I practice color correction to improve my skills?
Consistent practice is key to improvement. Regularly work on diverse projects, experiment with different tools, and challenge yourself with new techniques to refine your skills.
This page was last edited on 25 February 2024, at 2:26 pm