Figma is a widely used design tool that empowers designers to create visually appealing and interactive user interfaces. While it’s renowned for its collaborative features and vector editing capabilities, many designers may not be aware of the power of using a clipping path in Figma. In this comprehensive guide, we will explore the concept of a “clipping path” in Figma, how it works, its applications, and how it can enhance your design projects.
What is a Clipping Path in Figma?
A clipping path in Figma is a design technique that allows you to hide or reveal parts of one layer using the shape of another. It’s like creating a window through which you can view the content of one layer while using another as a mask or stencil.
How Clipping Paths Work in Figma?
In Figma, you can use a shape or layer as a mask to determine what’s visible in another layer. The content within the mask’s boundaries is shown, while content outside those boundaries is hidden. It’s a non-destructive way to create unique visual effects.
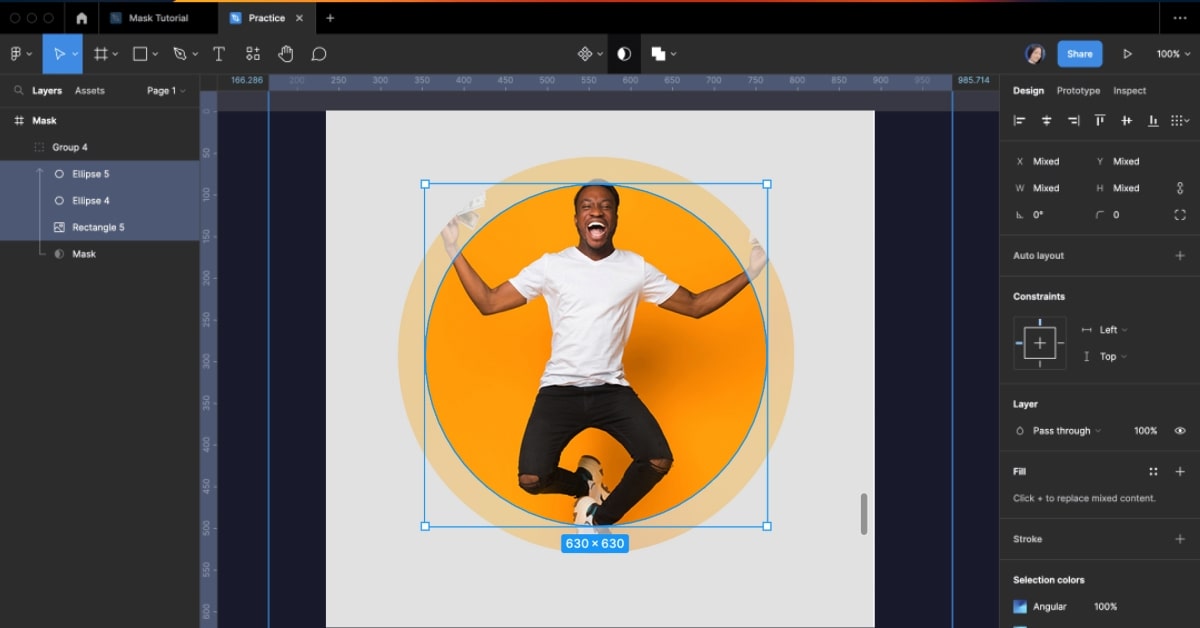
Creating Clipping Paths in Figma
Basic Clipping Path
- Create the shape or layer you want to use as a mask.
- Position it on top of the content you want to mask.
- Select both the mask and the content to be masked.
- Right-click and choose “Mask” from the menu.
Complex Clipping Path
- Use the Pen Tool or other vector editing tools to create a custom shape.
- Position it as a mask.
- Follow the same masking process as for a basic clipping path.
Applications of Clipping Paths in Figma
You can use clipping paths in Figma to crop images with precise shapes, creating unique visuals and focus points in your designs.
Creating Unique Shapes
Clipping paths allow you to combine shapes and layers in creative ways to form new and intriguing designs.
Designing Interactive UI Elements
In user interface design, you can use clipping paths to create interactive elements like buttons, toggles, and other components with unique shapes.
Benefits of Using Clipping Paths in Figma
The advantages of using clipping paths in Figma include:
- Non-Destructive Editing: Preserve the original content while creating unique designs.
- Precise Control: Create intricate and detailed compositions with ease.
- Interactive UI Design: Develop interactive and engaging user interface elements.
- Efficiency: Achieve complex visual effects and designs efficiently.
Conclusion
Clipping paths in Figma are a valuable photo editing technique that can elevate your visual content and enhance your user interface designs. By mastering this process and understanding its applications, you can create visually striking and interactive design projects that leave a lasting impression. Whether you’re cropping images, creating unique shapes, or designing interactive UI elements, clipping paths in Figma offer endless creative possibilities, allowing you to take your design skills to the next level.
FAQs
Q1. Can I apply multiple clipping paths to a single layer in Figma?
A1. No, Figma allows a single mask for a layer. However, you can combine shapes to create complex masking effects.
Q2. Are there limitations to using clipping paths in Figma?
A2. Clipping paths work best with vector content. Raster images may not offer the same level of precision.
Q3. Is the use of clipping paths limited to specific design projects in Figma?
A3. No, clipping paths can be used in a wide range of design projects, from web and app design to marketing materials.
Q4. Do I need advanced design skills to use clipping paths in Figma?
A4. Basic knowledge of Figma’s vector editing tools is helpful, and there are many tutorials available to assist with more complex applications.
Q5. Can I use clipping paths for interactive prototypes in Figma?
A5. Yes, you can apply clipping paths to create unique interactive elements in your Figma prototypes.
This page was last edited on 19 February 2024, at 5:06 pm