Microsoft PowerPoint, a renowned presentation software, offers various tools and features to create visually appealing slideshows. One such feature is background removal, allowing you to eliminate or modify backgrounds in your images. In this article, we’ll explore the art of background removal in PowerPoint, providing a step-by-step guide, advanced tips, and a Frequently Asked Questions (FAQs) section to help you make the most of this versatile tool.
Background Removal in PowerPoint
Background removal in PowerPoint is a simple yet powerful feature that allows you to remove or change the background of an image. This feature is invaluable for creating professional and visually cohesive presentations.
Step-by-Step Guide to Background Removal in PowerPoint
Let’s dive into the process of background removal in PowerPoint:
- Insert an Image: Open your PowerPoint presentation and insert an image that you want to work on.
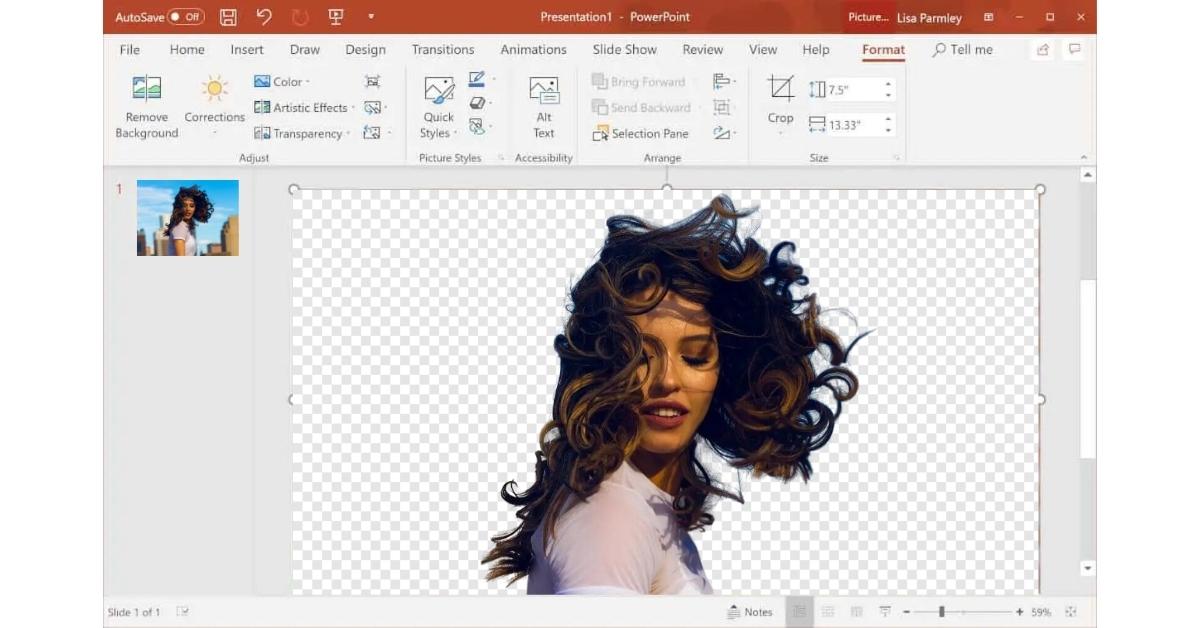
- Select the Image: Click on the inserted image to select it. This will reveal the “Picture Format” tab in the PowerPoint ribbon.
- Remove the Background: Navigate to the “Picture Format” tab, and you’ll find the “Remove Background” option. Click on it.
- Adjust the Selection: PowerPoint will automatically mark the background and subject with different colors. You can adjust this marking if needed, ensuring that the subject is in one color and the background in another.
- Refine the Selection: Fine-tune your selection by using the “Mark Areas to Keep” and “Mark Areas to Remove” options. This is particularly useful when PowerPoint’s automatic selection isn’t perfect.
- Apply Changes: Once you’re satisfied with your selection, click “Keep Changes.” The background will be removed.
- Add a New Background (Optional): You can now insert a new background to complement your subject or leave it transparent.
- Finalize the Image: Adjust the image size, position, and any other details to fit your slide’s design.
- Save Your Slide: Don’t forget to save your PowerPoint presentation to preserve the changes.
Advanced Tips for Precise Background Removal
- Select Multiple Images: You can apply background removal to multiple images in a single slide. This is particularly useful when creating consistent presentations.
- Use High-Quality Images: High-resolution images with clear distinctions between the subject and background result in more accurate background removal.
- Apply Custom Backgrounds: Experiment with different backgrounds to find the one that complements your message.
Applications of Background Removal in PowerPoint
Background removal enhances PowerPoint presentations in various ways:
- Professional Look: Create a clean and professional look for your slides by removing distracting or cluttered backgrounds.
- Highlight Key Information: Emphasize important elements in your images by removing the background or replacing it with something relevant.
- Consistency: Maintain a consistent visual style throughout your presentation by using similar backgrounds for multiple images.
Conclusion
Background removal in PowerPoint is a valuable tool for creating engaging and professional presentations. By following our guide and implementing advanced tips, you can make your slides more visually appealing and impactful. Whether you’re preparing a business presentation, educational material, or a creative project, PowerPoint’s background removal feature will help you craft a compelling story.
FAQs
Can I undo background removal in PowerPoint?
Yes, you can undo background removal by selecting the image, clicking on “Remove Background” again, and choosing “Discard All Changes.”
Does PowerPoint offer any automated background removal feature?
PowerPoint provides a semi-automated background removal feature, but you can fine-tune it manually to achieve the desired results.
What image file formats are compatible with PowerPoint’s background removal feature?
PowerPoint supports various image formats, including JPEG, PNG, GIF, BMP, and more.
Can I apply different backgrounds to different parts of an image in PowerPoint?
PowerPoint’s background removal feature works on the entire image, but you can create custom shapes with different backgrounds and overlay them on your image.
This page was last edited on 6 December 2023, at 12:00 pm