In the world of photo editing, achieving the perfect color balance is crucial. Whether you’re a professional photographer or an amateur looking to enhance your photos, color correction is a fundamental aspect of the process. Affinity Photo, a powerful and user-friendly software, has become increasingly popular for its robust color correction tools. In this article, we will guide you through the process of color correction in Affinity Photo, providing you with valuable insights and tips to master this skill.
Understanding Color Correction
Before delving into the specifics of Affinity Photo, it’s essential to grasp the concept of color correction.
What is Color Correction?
Color correction is the process of adjusting the colors in an image to achieve a desired, more accurate, or aesthetically pleasing result. It involves fine-tuning various aspects like hue, saturation, brightness, and contrast.
Getting Started with Affinity Photo
Why Choose Affinity Photo for Color Correction?
Affinity Photo is a popular choice for color correction because of its powerful features, including advanced color grading, curves adjustment, and real-time previews.
How to Install Affinity Photo?
You can download Affinity Photo from the official website or through app stores for various operating systems.
The Color Correction Process in Affinity Photo
Now, let’s explore the step-by-step process of color correction in Affinity Photo.
Step 1: Import Your Image
Open Affinity Photo and import the image you want to correct by going to “File” > “Open.”
Step 2: Adjust the White Balance
Correct any color temperature issues by adjusting the white balance. This is crucial for achieving natural-looking colors in your photos.
Step 3: Use the Curves Adjustment
The Curves adjustment allows you to fine-tune the tones and colors in your image. Make S-curve adjustments for better contrast and color vibrancy.
Step 4: Enhance Saturation and Vibrance
Boost the saturation and vibrance to make the colors pop, but be careful not to overdo it.
Step 5: Work with Selective Color
Use the Selective Color adjustment to target specific color ranges in your image and make precise corrections.
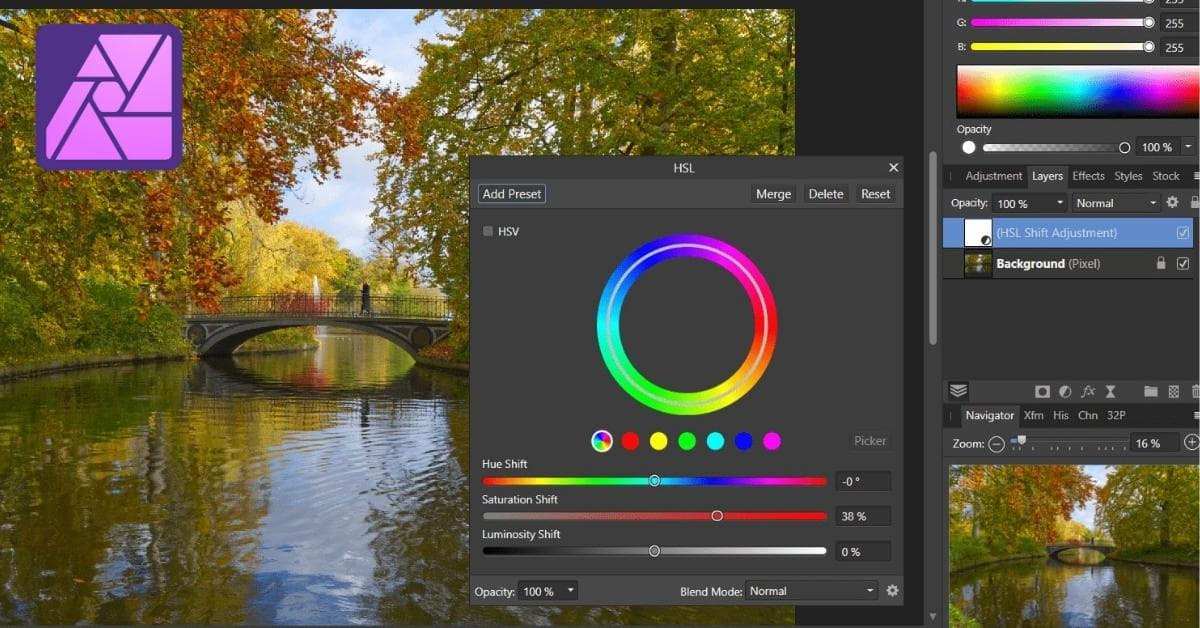
Step 6: Fine-Tune with HSL Adjustment
The HSL (Hue, Saturation, and Lightness) adjustment allows you to make further refinements to the individual color channels.
Step 7: Preview and Compare
Always check your changes with the “Before and After” view and make additional adjustments if needed.
Step 8: Save Your Work
Once you’re satisfied with your color correction, save your image.
Tips and Tricks
- Use layer masks for non-destructive editing.
- Familiarize yourself with keyboard shortcuts for a more efficient workflow.
- Utilize adjustment layers for flexible editing.
Common Color Correction Issues
My Image Looks Too Yellow. How Can I Fix It?
This issue can be resolved by adjusting the white balance towards the blue side.
How Can I Correct Skin Tones in Portraits?
Use the HSL adjustment to fine-tune the red and orange channels for natural-looking skin tones.
What if My Image Still Looks Dull After Adjustments?
Try increasing the overall saturation and vibrance, but be cautious not to oversaturate.
Conclusion
Mastering color correction in Affinity Photo is a valuable skill for photographers and digital artists. With the right knowledge and practice, you can transform your photos into visually stunning works of art.
FAQs
Q1: Can I use Affinity Photo on Mac and Windows?
Yes, Affinity Photo is available for both Mac and Windows operating systems.
Q2: Is Affinity Photo suitable for beginners?
Absolutely! Affinity Photo offers an intuitive user interface and is beginner-friendly. With practice, you can quickly become proficient in color correction.
Q3: Are there any free resources for learning Affinity Photo color correction?
There are many free tutorials and courses available online that can help you learn Affinity Photo color correction techniques.
Q4: Can I undo changes in Affinity Photo?
Yes, you can easily undo changes using keyboard shortcuts or the “Edit” menu. Affinity Photo allows for non-destructive editing, ensuring your original image remains intact.
Q5: Is it necessary to shoot in RAW format for effective color correction in Affinity Photo?
While shooting in RAW provides more flexibility in post-processing, you can still achieve excellent results with JPEG or other formats in Affinity Photo. RAW simply offers more data to work with.
By following this comprehensive guide and practicing the techniques outlined, you’ll be well on your way to becoming a proficient Affinity Photo color correction expert. Don’t hesitate to experiment and fine-tune your skills to achieve your desired results. Happy editing!
This page was last edited on 10 January 2024, at 5:44 pm