In the dynamic world of digital visuals, image color correction and retouching have become indispensable tools for photographers, graphic designers, and anyone involved in the realm of visual content creation. Whether you’re looking to enhance the vibrancy of your photos or correct imperfections to achieve a polished look, mastering these image editing techniques can significantly elevate the quality of your visuals.
Understanding Image Color Correction
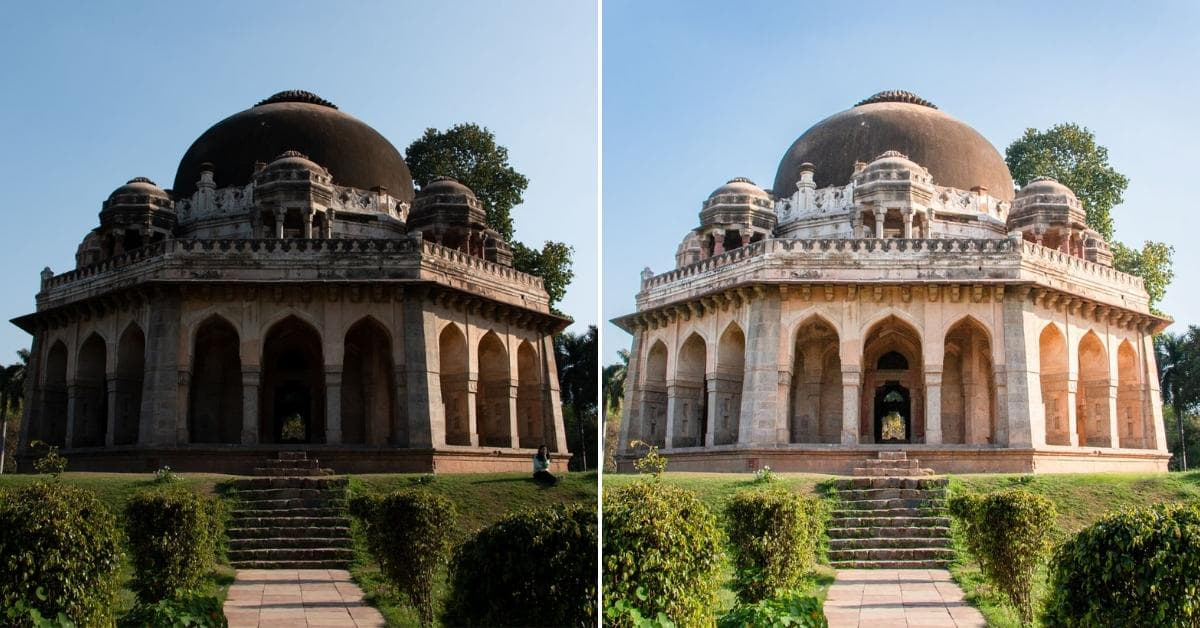
Image color correction involves adjusting the tones and colors in an image to achieve a more accurate representation of the subject. This process is crucial for correcting white balance issues, eliminating color casts, and ensuring that the colors in your image appear natural and true to life.
Tips for Effective Color Correction
- Use Reference Images:
Before diving into color correction, it’s helpful to have a reference image with accurate colors. This can serve as a guide to ensure that your adjustments align with the intended look. - Balance Color Channels:
Pay attention to individual color channels (red, green, and blue) and adjust them accordingly. This helps in fine-tuning the overall color balance of the image. - Experiment with Saturation and Vibrance:
Saturation affects the intensity of colors, while vibrance adjusts the saturation more intelligently by preserving skin tones. Experimenting with these settings can add depth and richness to your images.
Understanding Image Retouching
Image retouching goes beyond color correction and involves refining the overall appearance of an image. This includes removing blemishes, retouching skin, and enhancing details to achieve a flawless and professional look.
Tips for Effective Image Retouching
- Start with Basic Edits:
Begin by addressing basic issues like exposure, contrast, and color correction before delving into detailed retouching. This ensures a solid foundation for more intricate edits. - Use Healing Tools:
Healing tools, such as the clone stamp and healing brush, are essential for removing imperfections and unwanted elements from your image. These tools help create a clean and polished final result. - Focus on Detailing:
Enhance details selectively to maintain a natural look. Techniques like sharpening and dodging/burning can be employed to emphasize or de-emphasize specific areas.
FAQs
Q1: Can image color correction and retouching be automated?
Yes, certain software and tools offer automated features for basic color correction and retouching. However, for more precise and tailored results, manual adjustments are often necessary.
Q2: How can I ensure my retouching looks natural?
To achieve natural-looking retouching, use a light touch and avoid excessive alterations. Pay attention to details, maintain skin texture, and periodically zoom out to evaluate the overall effect.
Q3: Are there any free tools for image color correction and retouching?
Yes, there are free tools like GIMP, Paint.NET, and LightZone that offer robust features for color correction and basic retouching. However, professional-grade software like Adobe Photoshop is widely used for more advanced editing.
Q4: What is the difference between color correction and color grading?
Color correction focuses on fixing issues with the colors in an image to achieve a natural look. Color grading, on the other hand, involves stylizing or enhancing colors for creative purposes, often used in filmmaking or artistic photography.
Conclusion:
Mastering image color correction and retouching is an art that can significantly enhance the visual appeal of your photos. By understanding the principles and following effective techniques, you can bring out the best in your images, whether for personal projects or professional endeavors.
Remember, practice is key, so don’t hesitate to experiment with different tools and settings to find the approach that works best for your unique style and requirements. Happy editing!
This page was last edited on 28 February 2024, at 2:45 pm